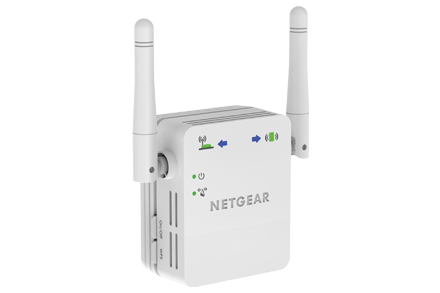
Netgear WN1000RP Setup
Netgear WN1000RP setup is done to boost the existing network range in the home. The Netgear WiFi booster increases the WiFi range by boosting it and enhancing the signal quality over long distances. It repeats the already existing signal from a host router and hence acts like a bridge between the router and the accessing devices that are placed outside the router’s range. If you are looking for information about how to install Netgear WN1000RP WiFi booster at your home, then you landed on the correct web page. You will find every single piece of information about its installation on this very web page.
How Netgear WN1000RP Setup Works?
After you have performed the Netgear WN1000RP setup using the mywifiext setup dashboard at your home, learn what it is going to do. The WiFi booster has two main jobs to be done:
- It accesses the existing WiFi network. This can be done by establishing a wireless connection between the router and the booster. When it connects to the existing router network, it acts as a network client. Just like how a computer accesses the network from the access point or the router, in the same manner, the booster is now accessing the router’s network.
- The WiFi booster acts as an access point for other devices. That means it has its own WiFi network that other devices can now access.
This is how it works like a bridge between the router and accessing devices.
When to Do Netgear WN1000RP Setup?
It is recommended by Netgear to install a WiFi booster only if your existing home network is weak or poor. If you experience WiFi dead zones in some parts of your home and there is zero or very poor network and you are in a dire need of accessing the network in such areas, then go for a WiFi booster.
Now that you have gained enough information about how a Netgear WiFi booster works and why you need one, let us move toward how to perform a Netgear WN1000RP setup at your home.
How to Do Netgear WN1000RP Setup?
Netgear WN1000RP booster setup is basically a 3-step process:
- Place Netgear WiFi booster
- Apply power to it
- Connect it to the existing home network
Let us see how you can get this job done easily.
Step 1: Place Netgear WN1000RP Booster
First of all, unbox your brand-new Netgear WN1000RP WiFi booster. Next, place it in the same room where the host router is placed. Once the setup process is completed, you can shift your Netgear booster to a new location where you want to boost the network.
Step 2: Apply Power to WN1000RP
Now, plug your Netgear WiFi booster into an active wall socket. Press the power button to the On position. The status LED should turn green.
Step 3: Connect to WiFi Network
It is now time to connect your WiFi booster to the existing WiFi network so that the range can be extended. You can do this in two ways:
- Set up with WPS
- Use Netgear Genie smart setup wizard
Netgear WN1000RP Setup via WPS
WPS or WiFi-protected setup helps you to complete the setup process without having to type any username or password. You just have to use a button present on your device named WPS. Here is how you can do Netgear WN1000RP setup using the WPS button:
- Ensuring the devices are powered up properly, locate the WPS button on the Netgear WN1000RP booster.
- Press the button.
- Now similarly, locate the WPS button on the router as well and press it.
That’s it! The Netgear WN1000RP WiFi booster setup is completed. The WPS method does not support WEP network security. Thus, if you are using WEP security, then use the next method to set up your Netgear WiFI booster.
Netgear WN1000RP Setup via Netgear Genie
It is now time to learn the second method to do the Netgear WN1000RP setup. In this, you use mywifiext.local web address to access the Netgear Genie smart setup wizard.
- Power up your computer or laptop now.
- Fire up a web browser now.
- In the URL bar of the browser, type the login web address without making any typing errors.
- Hitting the Enter key will redirect you to the Netgear booster login page.
- On this page, you will see two fields wherein you need to enter the default login username and password. You can refer to the user manual to get the default admin credentials.
- Now, click on the Log In button to navigate to the Netgear Genie smart setup wizard.
- Following the on-screen prompts will take care of the rest job.
For your information, you can also use the default IP address 192.168.1.250 to access the Netgear Genie smart setup wizard. Now that you have completed the Netgear WN1000RP setup process, you can move it to a new location. So, unplug it from this place and find an active wall socket near the place where you want to boost the network and plug it in. Now you can access the boosted network on any device.
Need Further Assistance?
Although the entire Netgear WN1000RP setup process is fairly easy, under any circumstances, if you feel stuck anywhere while getting through the process, getting help from our experts is recommended. While contacting them, you need not to worry about the time. They will be more than happy to assist you at any point in time of day or night.